The Chef

My photo
Now Departing from DEN, DFW, LAX, IAH, OAK, and SFO!
Nomadic, love captive of the King, wholeheartedly loving, creating, and cooking my way through life in the city...with the help of viewers like you!

Friday, September 24, 2010

Bangin' Noodle Salad

Recently my life has been a little crazy.  I have been traveling a lot, not home so much, and consequently cooking a little bit less.  These last few weeks I needed a dish that I could just throw in a Tupperware container and take to lunch without it leaving me uninspired and lacking in nutritional value.  This dish has been my staple for the last two weeks, because you can make a lot or a little according to your needs and it keeps for a week easily in the refrigerator.

I also appreciate this dish because in keeping with the theme of Inner-City Eats, it can be me made in a dorm room, or small  apartment without much of a kitchen, and entirely out of the corner fruit market in my urban village.  The title of the dish was derived from the hit 'n' run fender bender I was in this week, directly in front of my local fruit market!  We all know these things happen on occasion and there is nothing like good food to calm you down after you've been all banged up!   So, in keeping with the vernacular, while also honoring the chaos of the inner city,  I give you...

Bangin' Noodle Salad
 Pasta:
1-- 16oz. Pkg. Spaghetti, Angel Hair, or Vermicelli Pasta

Dressing:
4 Tbs.  Seasoned Rice Vinegar
4 Tbs. Soy Sauce  ( I prefer Tamari)
1/4 Tsp. Fish sauce
1 Tsp. Sesame Oil
1 Tbs. Siracha Chilli Sauce (less if you don't like spice)
1 Tbs. Minced/finely chopped Fresh Garlic
5 Tbs. Olive Oil

Salad: 
1 bushel of cilantro
1 Bushel of Green Onions
1 - 2 large Tomatoes


Cook the Pasta to your liking.  Preferably cooked until it is limp and no longer gives the sensation of chewiness when you munch on it.    Once it is finished cooking swiftly rush it to the sink, with the COLD water running and drain it.  Follow it up with about a minute worth of cold water rinsing.  Then toss it with  4-5 tablespoons of olive oil to keep it from becoming starchy and sticky.

While the Pasta cooks,
slice up your favorite salad toppings.  I use cilantro, green onion, and tomato.  Dice them into 1/2 inch or smaller bits and toss them into the cooled & oiled pasta.  

Mix up the dressing!
Toss all of the liquids together into a bowl, or I prefer a jar and bang it up.  Include the minced garlic in the dressing as well.  Stir or shake this vigorously until it is well integrated. 
 
TOSS IT UP!   Throw everything together in a large bowl with the salad, pasta, and dressing and toss it with chopsticks or a couple forks, or any ethnic cutlery of your choosing and then eat it until your heart's content, or until your portion control lunch tupperware is empty.   
 

Saturday, August 28, 2010

The 'College-Try' Tuna Melt

                   The 'College-Try' Tuna Melt                          

I am sure you have hear the phrase, 'give it a good old college try.'  I'm not really sure what it means exactly or where it came from.  But I know the sandwhich I made for lunch today definently applied!  It also happens to be one of my first 'replicate me' recipes for dorm students.


I am sure you remember, Dorm life = restricted cooking access!  You are limited items such as hot plates, the trusty george forman, and your mini-fridge.  Well the 'college try' tuna melt only requires your George Forman and will leave you reeling from the tantalizing sensation of asian meditteranean fusion dancing around in your mouth!

For this two melts you will need: 
1 Tbs Mayo
2 Can Tuna
2 tbs chopped fresh Basil & Cilantro  (or dried herbs use 1 tsp)
1 tsp grated ginger (Or dried powder ginger...use 1/4 tsp)
2 Tsp honey mustard
2 drops Sesame Oil
1 Avocado
4 Tbs shredded cheese
4 Slices of Bread (Whatever you prefer, I used soft Wheat)
2 Tbs Butter
1/4 tsp crushed garlic


To Begin:
                Create an herbal butter spread
In a small dish combine two tablespoons of butter with one tablspoon of fresh chopped cilantro and basil and 1/4 teaspoon of crushed or finely chopped fresh garlic.  Mix the ingredients vigorously until the butter is smoothly blended with the herbs and garlic. 

              Season the Bread
Once your herbal butter is ready spread a thin layer on both sides of the sandwhich bread, both inside and out.  You can be more generous with the spread on the inside of the sanwhich, but be gentle with it on the outside because it will burn rather than brown if the layer is too thick.


To Mix the Filling:
    In a cereal sized bowl add two cans of well drained tuna, with the Mayo, ginger, sesame oil, honey mustard, one tablespoon of the freshly chopped herbs, and mix vigorously again. Prefferably with a fork so the tuna breaks up and encompasses the entire mixture.

                                                                   Assemble & Grill:           
     Once your tuna is mixed and your bread is seasoned you can assemble the sandwhich for grilling.  I suggest a layer of the tuna filling followed by two tablespoons of shredded cheese then 3-4 thin slices of avocado and then the top. 

   Place it on the grill, close it, and press down for 7-10 seconds.  Then release the pressure and allow it to grill for one to two minutes until the cheese is apparently melted and the outside of the panini is lightly browned.

Eat Fresh...Subway doesn't have anything on this sanwhich!

Sunday, August 1, 2010

Sunday Roasted Chicken

Sunday Afternoon is a time for rest and preparing for the week ahead.  For me, this means some recreation which includes cooking!  Thankfully my favorite pasttimes also help me prepare for a week of delicious meals.  One of my favorite things to do on a Sunday afternoon when the spirit moves me is roast a large portion of meat that I can use all throughout the week.  You have already seen my Pot Roast, just a few posts down, but today, I am bringing you my simple Roasted Chicken. 

A few notes of preparation for a week of delicious chicken items:

    DON'T THROW AWAY THE GIBLETS!  That little bag of chickin insides that nobody seems to want these days is full of delicious flavor starters.  Don't look down on your grandmother's old fashioned ways...they were good ways!  Put those insides and any extras you might choose to trim into a ziploc and pop it in the freezer for later!  (My next blog will surely be my timeless chicken soup from scratch...using these items!)

Here is what you need to get started! Preheat your oven to 400 Degrees Farenheit

Ingredients


1 (3 1/2 pound) whole chicken

Salt and pepper

1 bunch basil

5 cloves garlic   (pop them whole skin on in the microwave for 10 seconds and the skin pops right off!)

Kitchen twine

2 tablespoons vegetable oil or Olive Oil

2 Key Limes  (or your favorite citrus fruit)
Preparation
Place your chicken in a roasting pan or casserole dish. Pat it dry with a paper towel.  The dryer your bird, the crispier the skin.  Slather it in olive oil, salt and pepper.  Stuff the inside with a healthy handful of fresh basil leaves.  Then tuck 5-7 garlic cloves into all the hidden places you can find.  Under the wings and the legs, in the cavity, under the skin, and anywhere you can manage to sneak them.  Lastly, squeeze the juice of your favorite citrus fruit over the top of the bird, giving it a little acid wash and a hint of flavor. 


Roasting

I like the look of a trussed bird.  Some say it cooks unevenly and isn't the best way to go, but I preferr it.  However, if you don't have trussing string, don't use a pair of shoelaces, just go without, it won't hurt a thing.

Tie the legs togeher in the back and cut a small slit in the front of each thigh then tuck the wings in tight while you wrap a piece of twine around the breast of the bird, top to bottom securing the wings in place tucked up close to the breast and into the thigh.


Finally, leave your lime leftovers in the pan for a delightful aroma in your home as it roasts.  Place your dressed up bird in the center of the roasting pan, in the center of the oven, and I suggest you turn the oven down to 375 and roast it 20 minutes per pound.  About an hour.  Always use your meat thermometer and check to be sure your bird is fully cooked. 

When your bird is cooked, you can have it for sunday dinner, or do as I always would shredd it up and have lots of leftover dishes through the week.  Chicken tacos, chicken salad, chicken and rice...etc.  But whatever you do...DONT TOSS OUT THOSE BONES!

Toss them in a freezer bag and put 'em in the freezer because sometime this week I will teach you how to make a masterpiece out of them!  Every part of the bird is useful!

Thursday, July 29, 2010

Red Quinoa Pizza

This pizza was an inspiration from the very heart of Pizza's beginnings.  Originally, as the tale goes, pizza was never meant to adorn the average dinner table.  It was the leftover dough and meal bits from your Italian Nonna's table the night before tossed together and then fed to the servants or the dogs.  However, the introduction of a food into the New World often means the transformation and recreation of it's reputation as well.  Americans stereotypically love to give value to things that are considered trash to other culinary cultures.  Because of this trait we can claim the true Pizza as an American Artform.

Well my roomate Lydia and I in the spirit of Old Italy with the adventurous hearts of the New World ventured into our leftovers and created this culinary delight, and so we now share it with you. 

RED QUINOA PIZZA

Quinoa is a red grain that comes from Peru, but is now regularly found in your local Whole Foods or Trader Joes market.  It is a perfect whole grain that is also gluten-free!  We use it as a substitute for rice, a great stuffing for peppers, or just as a side dish.  I have leftovers in my fridge on a regular basis.


Ingredients:

1  Trader Joes Fresh Pizza Dough 
1  Jar of your Favorite Alfredo sauce...or you can be a Betty and make it if you want!
1 C. Cooked Quinoa
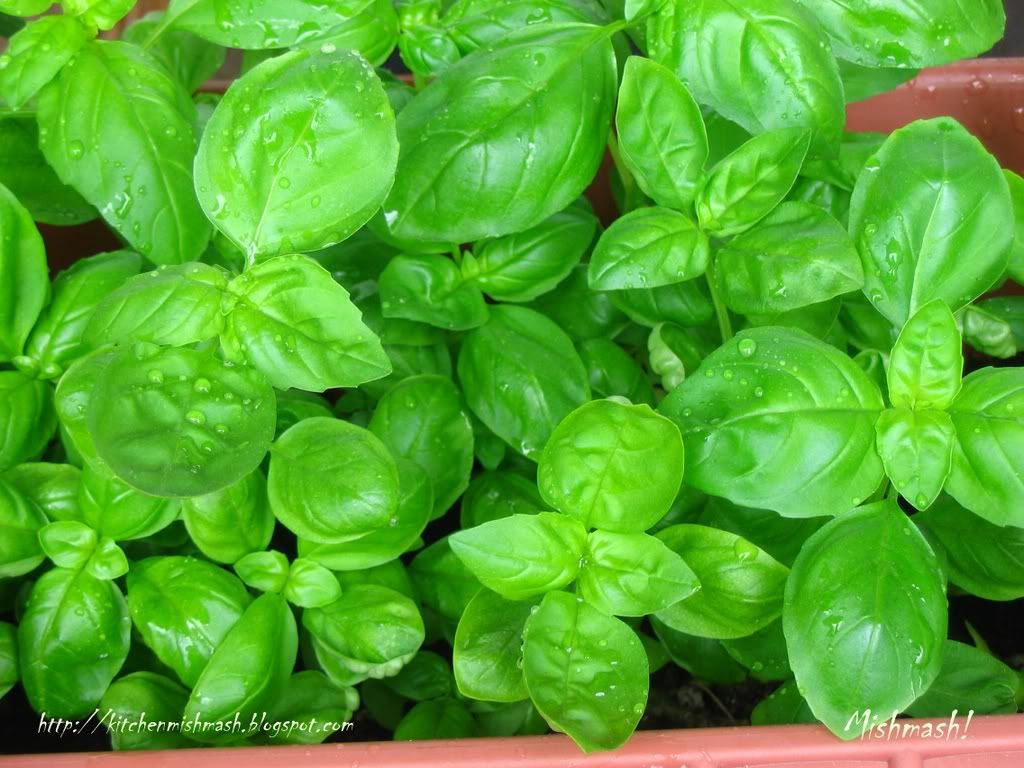
1  Handful of fresh Sweet Basil Leaves
3 C.  of your favorite White Cheese.  (My personal preference is a mix of asiago, mozerella, parmesan, and provolone.) This is a LOT of cheese, so feel free to scale back if you wish.
1/2 C. Diced Peppers, red, greeen, yellow, orange.
1/2 C. Squash  (also leftover from the Ratatouille the night before)
1/4 C. Fresh julianned Red Onion
1/2  Beefsteak or Roma tomato sliced thin


Assemble and TOP-IT:

After you have allowed your dough sufficient time to rest at room temperature, roll it out or hand toss to your preffered shape and size.  I prefer thin crust so I hand toss it thin and square to fit on a cookie sheet.  My dough is rarely even or pleasant looking...it is going to be covered up anyways so don't try to hard or get yourself frustrated.  It is just the begining!

Once you have your dough spread out on a well oiled cookie sheet or on your fancy pizza stone then poke it all over with a fork and pop it in the oven for 1-3 minutes to let it set and rise some more.  Prepare all your ingredients by chopping them up or slicing them elegantly to layer onto your dough.

Once you dough comes out of the oven a little pre-cooked, top it with your alfredo sauce, followed by evenly sprinkled cooked quinoa.  Then your vegetables, squash, peppers, and tomatoes, followed by your basil leaves and evenly distributed shredded cheeses. 

Don't feel restricted to these ingredients, use whatever side dish leftovers you have available but beware...the more ingredients the harder it is to bake so it is recomended to keep it under 3-4 main toppings.

Bake:
Preheat your oven to 400-450 depending on your pizza dough instructions.  Don't forget to pop that dough in the oven for a few minutes before topping it.  Once it is fully topped place it in the dead center of your oven and close that door and don't open it until your cheese is melted and starting to become golden around the edges near the crust. 

Once you see the cheese start to hint of golden brown near the edges it is time to take it out and let it rest for 5+ minutes while all the toppings marinate together. 

Then cut it, dive in, and enjoy!  Remember...Pizza is not pretty, it was originally meant for the dogs...but this one tastes like it was mean for kings and queens!

Monday, June 14, 2010

Mango Limeade Icy Pops...keep the heat away!

Tragically summer is best known for scorching heat and rising temperatures.  In the city however, those temperatures get magnified and held in by the polution and sheer number of people on the move all the time.  In Oakland, the summer temperatures are suprisingly bearable, however this has resulted in the sadly all to common LACK of any form of air conditioning in most buildings and apartments.  I have the incredible priveledge of a cieling fan, which does wonders in the heat, but most have almost no relief. 

Are there any flavors quite as refreshing as a glass of limeade and a fresh juicy mango?  At the latino fruit market across the street I can aquire a fresh mango & 5 limes for $0.89 cents.  Yet again demonstrating the joy of savvy living in the inner city!  Get your summer cure started around noon, and by the overbearing heat of 5pm, your icy relief will be ready.  So, I give you the Mango Limeade Icy pop! 

(These portions are based entirely on the number and kind of icy pop container you have.  This is set for the average store bought Icy pop trays, but make more or less to your liking.  If you don't have an icy pop tray, use your ice cube tray and popsicle sticks cut in half, or just toothpicks.  It would make great BBQ hors d'oeuvres)
 Ingredients
1 Large Fresh Mango
1-2 Lime
1 Bag of Frozen Chunks of Mango (usually in the frozen fruit section.)
***Optional Sweet Tooth Addition: Simple Syrup or (equal parts sugar & water melted together & cooled) Pictured to the left.


STEPS
1.  Peel the mango gently and scrape all of the meat out into a bowl, scraping as much off the seed and the peel as possible. 
2.  Juice the lime into the bowl with the mango.
3.  Using a fork mash the two ingredients toggether.
4.  Drop severel pieces of the frozen mango chunks into your icy pop tray.
5. Then spoon the Mango lime mixture into the tray, encouraging it to slidedown and around your mango chunks. 
*** At this point you might realize your mixture is too thick and want to dilute it a little in order to make sure it fills your containers.  You have several options.  More lime juice.  Simple Syrup.  or Water.   I reccomend lime juice if you really enjoy tart treats.  I reccomend simple syrup if you have a sweet tooth.  I reccomend water if you are giving this treat to children, the mango is plenty enough sugar for them. 

Pop ur Pops in the freezer for several hours until froozen.  When they are finished run them for 1-2 seconds under some warm water to release them from their container and let the refreshing icy pop do it's job.

Delightful Additions to make this icy pop a BBQ favorite...

1. The Latin Pop:
     Rub some simple syrup on the inside of your icy pop tray and then lightly Sprinkle Lime Salt and chilli on the insides of the containers before you fill them, adding a layer of color, texture and flavor to the outside of your pops. 

 2. Mint Pops:
Rinse a bushel of mint leaves and the spread some simple syrup inside each icy pop tray.  Stick 1-2 whole mint leaves to the sides of your icy pop containers and then fill them.  Adding dimension to your pops and a layer of fresh flavor.  But remind your guests they might not want to eat the mint leaf, just toss it out once it melts off your pop.

Friday, June 4, 2010

SummerTime Pot Roast - 15 min Prep :: 3 Hrs CookTime

 SummerTime When the Livin is Easy...
                                                                ... The food should be too!

Today reminded me of those first days of summer as a kid.  Those first few days after the school year was finally over, when you first convinced your body to sleep in.  It was mildly hot, and boredom set in about 2pm...so did hunger.  So what better way to spend an afternoon than preparing an incredible dinner.   It is with that I give you the first Inner-City Eats recipe!

Pre-Heat your oven to 350 Degrees F.


Ingredients:
Cheap Medium Sized Chuck Roast   (yes, as in 'inexpensive'...less than $10)
1 Can Cream of Celery Soup (Subsititute with your favorite 'cream of..' condensed soup)
3-6 Cloves of Garlic (Depending on your The Garlic Rule**)
3 Carrots (cleaned)
2 Stalks Celery
1/4 C. Marsala Wine
2 TBS. Worcestershire Sauce
3 Bay Leaves, Salt, Pepper, Seasoning Salt to taste.


Tools:
Dutch Oven, High Sided Cast Iron Pan, or Deep Casserole dish with a cover, or Aluminum Foil.


Prepare the Roast:
     Give your roast a relaxing massage with a light sprinkling of salt, pepper, & seasoning salt on all sides.

  2-3 teaspoons of OliveOil into a heavy bottom skillet or cast-iron over med-high heat, lightly sear all sides of the roast, about 3-4 minutes per side. 

 
As your Roast Sears:
   Rough chop a whole yellow or white onion, 3 medium sized carrots, 2 stalks of celery, garlic. 
 

 Whisk together Worcestershire, Marsala, Cream of Celery soup, Bay leaves, & 3/4 c. Water.


Prepare it for the Oven:
     Transfer your seared roast to your dutch oven, casserole dish, or a plate for few moments, while you turn down the heat on the searing pan and toss in the onions and garlic for about 2-3 minutes for a quick sautee in the same pan used to sear the roast.  


Once you have tossed them around a litte, either return the roast to the searing pan, or pour the onions over the roast in the roasting pan. 


 Toss all the other veggies into the pan also and pour your gravylishious mixture over the top of the roast. 

Cover it with the top, or aluminum foil and pop it in the center of the oven for 2.5-3 hours at 350 Degrees F.


**The Garlic Rule:


      1-3 Cloves:  If you are single without prospects stick with less garlic, just in case one of your handsome single neighbors smells your cooking and his nose leads him to your doorstep, you don't want to have garlic breath.

     3-6 Cloves: For those who cook for two.  If you are both eating it, your breath will be equally garlically and should not produce relational conflict.

     6+ Cloves: For either the Celebate, the Happily Married, or the one with the Cold. This much garlic urges on medicinal.  Some of my recipe's will call for this level of garlicy influence, but if used inappropriately there is no telling what harm it could do to your social life.  However, medicinally, it may kick that cold ASAP!